Be yourself; Everyone else is already taken.
— Oscar Wilde.
This is the first post on my new blog. I’m just getting this new blog going, so stay tuned for more. Subscribe below to get notified when I post new updates.
Be yourself; Everyone else is already taken.
— Oscar Wilde.
This is the first post on my new blog. I’m just getting this new blog going, so stay tuned for more. Subscribe below to get notified when I post new updates.
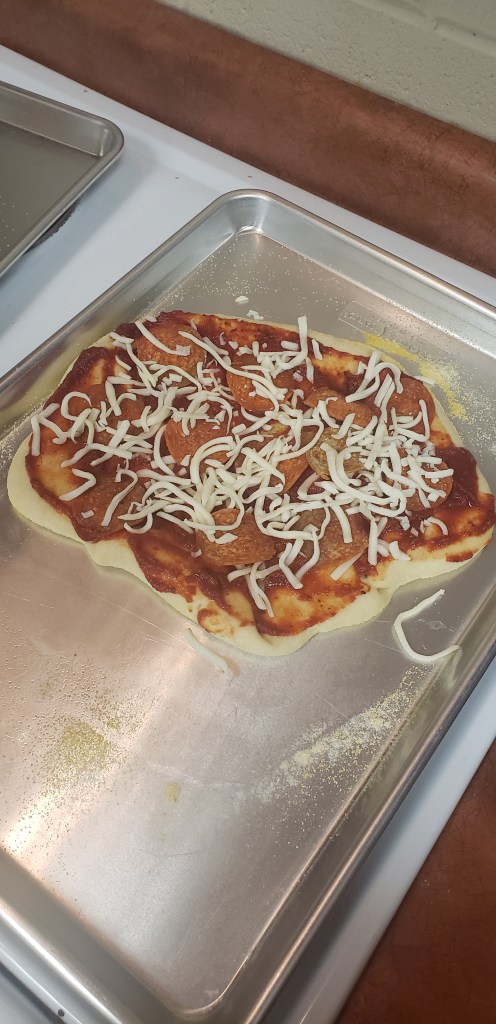
In our cooking class we had to make our own sauce we would like on our pizza. For my sauce I wanted it to be a little spicy but not to much with some savory hints in their and i wanted some sweetness and sourness in their so everything mixed together to create a balance of flavors. So I first started with what I would definitely need which was tomato sauce and tomato paste. After adding the basic needs for my sauce I added some oregano, basil, garlic powder, and Italian seasoning to give my sauce a savory taste. Next, I added some paprika, chili powder, crushed red pepper and hot sauce to give my sauce a little bit of a spicy taste. The third thing I added was some sugar to give my sauce some sweetness so the spicy and sweetness would balance and nothing would be to overpowering. Lastly, I added some lemon juice to give it a sour and acidic taste to enhance all the flavors together. Once I added all the seasonings together it was a great flavor and everything was balanced very well.
In The pizza we made for our lab it was not what I was expecting. I thought it would turn out better but it didn’t as much as what i thought so. I didn’t get to roll the dough flat enough because I was running out of time so the dough was kind of pretty thick. But other than the dough everything turned out pretty good. Only I wish I didn’t add as much basil to my sauce because I tasted the flakes a lot more than you should. The aroma of the pizza was very good. And it tasted really good. And when it came out of the oven it looked very good because the cheese was all melted. I personally would not make this again because the pizza reminded me of a lunchable because of the sauce I made and how thick the crust was and how kinda hard it was once it was chilled. But other than that it was a very fun lab and I enjoyed making the pizza.
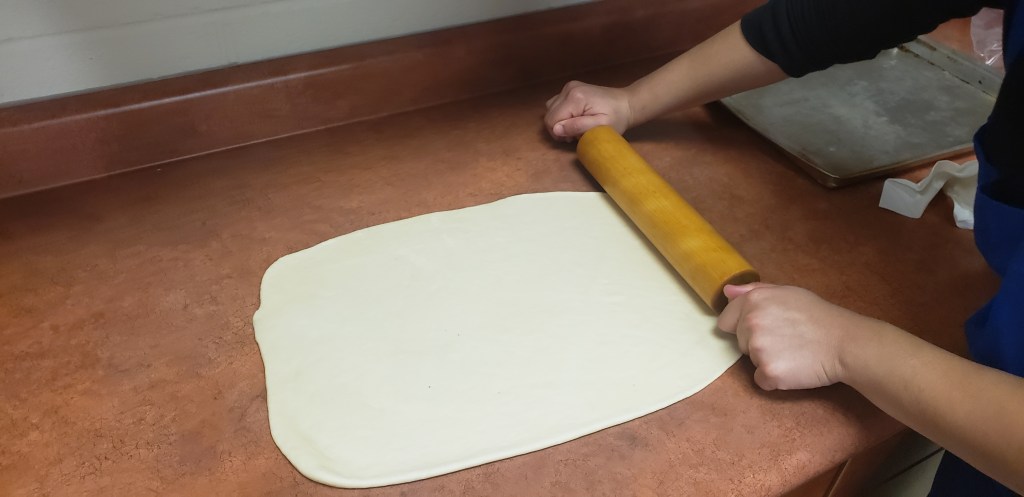
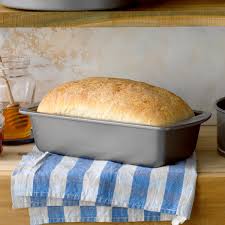
When we started cooking with breads we had to use yeast to start it all off. When using yeah you have to make sure you have your water temperature at 105-110 degrees F so the yeast can activate properly in order to create your dough. After we get the yeast activated we then have to start to knead the dough to create a structure for your cooking. After you are done kneading the dough you will want to test the dough with the window pane test. When you test the window pane test its in order to see the gluten you have created, so you know your dough is ready. After you are done testing it you have to sit the dough in the fridge s it can rise or also know as fermentation. After you take it out of the fridge you can start to punch the dough. The reason you want to punch the dough is so you can let all the air bubbles out that are in the dough so it can bake evenly. After you get all the bubbles out of the dough you can start shaping your dough into the shapes you want for your bread. Once you get your dough shaped you can dock it so it give some sort of texture to it while it bakes. Finally, after you are done with all of these steps you can finally start baking your bread.
After making our bread it had a very good smell. The smell was not to strong or too little. When we pulled our bread out it was very golden brown the way we wanted it. And when we cut into it the outside was crispy and the inside was very soft. Once we started to taste it, it was very good. Nothing was too overpowering and nothing was too little. When we were following the steps to make our bread it was very easy. All the steps were worded right so you understood what they were saying. It was a very fun lab because the ingredients were known already and the steps were easy to follow.
| Ingredients from prep table: | 2 envelopes dry active yeast (1 ½ Tablespoons) |
| 2 Tablespoons honey | |
| 1/2 cup water plus an additional 1 cup warm water | |
| 3 1/2 to 4 cups flour | |
| 2 teaspoons salt | |
| Cooking spray | |
| Equipment from prep table/area/pantry: | 1 plastic baggie, inside sprayed with cooking spray |
| Sticker with lab names, period number, and kitchen number | |
| Equipment from kitchen: | Measuring equipment |
| Mixing bowl | |
| Bench scraper | |
| Wooden spoon |
| # of minutes: | Step #: | Directions: | |
| 5 | 1 | Cell phones in holder Listen to class directionsTie up hair, check clothing Wash hands Grab apron, dish towels, and dish rag (backroom)Start dishwater | |
| 1 | 2 | Set out tray with lab plan & equipment on it | |
| 5 | 3 | Take tray to prep table to get ingredients/equipment in one trip | |
| 5 | 4 | Combine the honey, yeast and ½ c of water (105-110 degrees), stir, let sit for 5 minutes | |
| 1 | 5 | Mix the flour and salt, then slowly add the yeast mixture. | |
| 5 | 6 | Add the additional 1 c water a little at a time (you may not need it all) until dough form ball that isn’t too sticky | |
| 1 | 7 | Dust counter with flour | |
| 10 | 8 | Knead dough on dusted spot until smooth and elastic | |
| 1 | 9 | Shape dough into ball | |
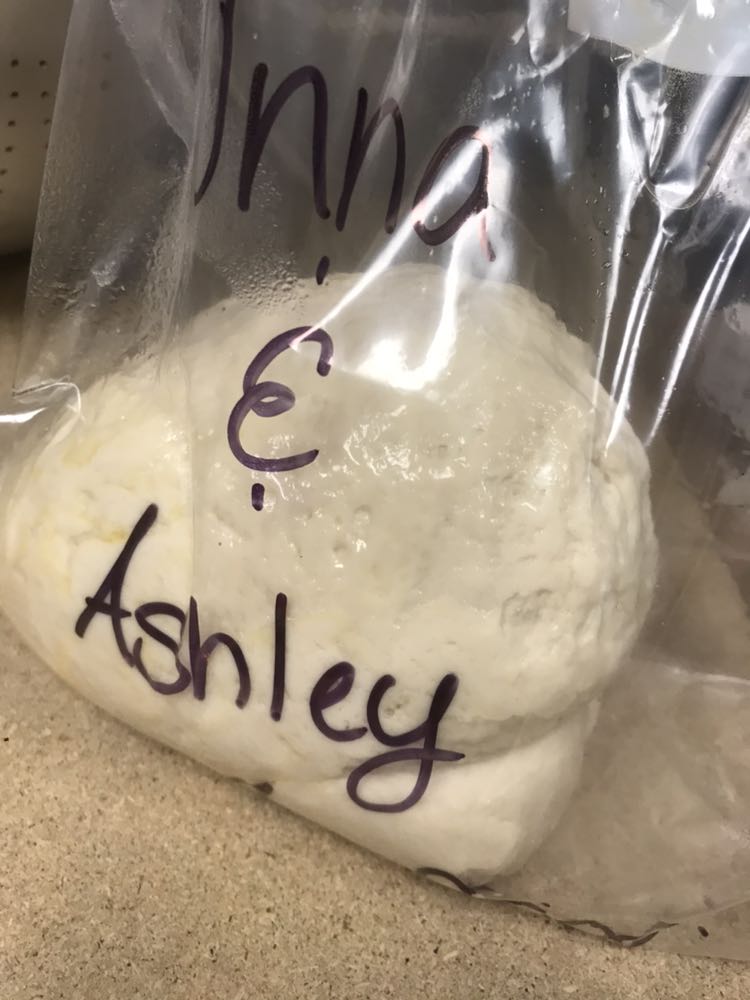
| 1 | 10 | Put dough ball in baggie and seal 3/4 of the way shut | |
| 1 | 11 | Label and place dough in designated spot | |
| 1 | 12 | Complete rubric and turn in | |
| 5 | 13 | Wash and thoroughly dry dishes. Return dishes to their correct spot. | |
| 1 | 14 | Take aprons back to rack and put dirty dish towels in washing machine | |
| 1 | 15 | Call Miss Fenn over for checkout (you may have some additional tasks) | |
| 1 | 16 | Take lab plans back to binder, have a seat. |
Day 2
| Ingredients from prep table: | 1 Tablespoon cornmeal |
| Bread dough | |
| Cooking spray | |
| Equipment from prep table/area/pantry: | 1 cookie sheet |
| Plastic wrap | |
| Sticker with lab names, period number, and kitchen number | |
| Equipment from kitchen: | Bench scraper |
| Paring knife | |
| Measuring supplies |
| Time on clock: | # of minutes: | Step #: | Directions: |
| 5 | 1 | Cell phones in holder Listen to class directionsTie up hair, check clothing Wash hands Grab apron, dish towels, and dish rag (backroom)Start dishwater | |
| 1 | 2 | Set out tray with lab plan & equipment on it | |
| 5 | 3 | Take tray to prep table to get ingredients/equipment in one trip | |
| 2 | 4 | Punch dough and push out any remaining gas bubbles | |
| 1 | 5 | Divide dough in two | |
| 5 | 6 | Take first half and shape into baguette by taking each side the top and bottom half and folding over into middle until dough is 12-14 inches long | |
| 5 | 7 | Repeat with second half of dough | |
| 1 | 8 | Evenly dust cookie sheet with cornmeal | |
| 1 | 9 | Place shaped dough on cookie sheet and dock with paring knife | |
| 1 | 10 | Spray dough with cooking spray | |
| 1 | 11 | Loosely cover dough with plastic wrap | |
| 1 | 12 | Label and place dough in designated spot | |
| 1 | 13 | Complete and turn in rubric | |
| 5 | 14 | Wash and thoroughly dry dishes. Return dishes to their correct spot. | |
| 1 | 15 | Take aprons back to rack and put dirty dish towels in washing machine | |
| 1 | 16 | Call Miss Fenn over for checkout (you may have some additional tasks) | |
| 1 | 17 | Take lab plans back to binder, have a seat. |
Day 3
| Ingredients from prep table: | 1/2 cup of heavy whipping cream |
| Pinch of salt | |
| Dough | |
| 1 egg white | |
| 1 TBS water | |
| Equipment from prep table/area/pantry: | Serrated knife |
| Mason jar with lid | |
| Butter knife | |
| Plates | |
| 1 rubric per group | |
| 1 lab eval per person | |
| Equipment from kitchen: | Measuring supplies |
| Time on clock: | # of minutes: | Step #: | Directions: |
| 5 | 1 | Cell phones in holder Listen to class directionsTie up hair, check clothing Wash hands Grab apron, dish towels, and dish rag (backroom)Start dishwater | |
| 1 | 2 | Set out tray with lab plan & equipment on it | |
| 4 | 3 | Take tray to prep table to get ingredients/equipment in one trip | |
| * | 4 | Preheat oven to 450 degrees F | |
| 20 | 5 | Bake dough for approximately 15 mins or until it is hard when knocked, lightly brush egg wash halfway through baking | |
| * | 6 | Put cream and salt in mason jar and shut lid tightly | |
| * | 7 | Shake cream jar as hard as you can until a ball forms | |
| * | 8 | Rinse butter ball under cold water and shape with hands | |
| 5 | 9 | Eat | |
| 1 | 10 | Complete rubric (1 per group) | |
| 1 | 11 | Complete lab eval (1 per person) | |
| 5 | 12 | Wash and thoroughly dry dishes. Return dishes to their correct spot. | |
| 1 | 13 | Take aprons back to rack and put dirty dish towels in washing machine | |
| 1 | 14 | Call Miss Fenn over for checkout (you may have some additional tasks) | |
| 1 | 15 | Take lab plans back to binder, have a seat. |


In our Breakfast Taco lab we had to make Breakfast tacos. At the same time we had to be sure to know about safety and sanitation in the kitchen. For sanitation you need to understand the following Foodborne illness, Salmonella, 160 degrees, Safety, Plastic spatula, evaluation. Foodborne illness it is caused by unsafe food, also known as food poisoning. It can be caused by bacteria, parasites, fungi viruses and harmful chemicals. Salmonella is when bacteria typically live in animal and human intestines and are shed through feces. Humans become infected most frequently through contaminated water or food. For 160 degrees you need to make sure your eggs are cooked to that temperature. You need to make sure your eggs are cooked correctly to that temperature so you don’t cause any unsafe problems for yourself. To keep your kitchen safe you should probably clean up as you go and do not cross contaminate any of your foods that could cause harm to your body. You should use a plastic spatula to cook your eggs because it will help your eggs not stick to the pan and not cause any scratches in your pan. Lastly, for evaluation we have to make sure our kitchen is cleaned up and make sure all our dishes get washed. We make sure to return all of the supplies we borrowed are put back in their places so it is not unorganized.
Throughout the lab it was a pretty easy recipe. The only thing that might be difficult is telling if our eggs are done or not. The lab in general is pretty easy. It tasted pretty good because all of the flavors were there. Nothing was too overpowering. When everything was done it smelt really good, nothing smelt bad. When you finish your product it looks pretty good it has pops of color but its not to much colors. And the colors are not dull and boring. The recipe will be down below and I will include some pictures from the lab as well.
| Ingredients from prep table: | 2 eggs per lab member |
| 2 TBS cheese per lab member | |
| 2 tortillas per lab member | |
| 1 can cooking spray | |
| Salt, pepper, green onions, salsa, and/or hot sauce for topping | |
| Equipment from prep table/area: | 2 frying pans |
| 1 plate per person | |
| Equipment from kitchen: | Measuring supplies |
| Whisk | |
| Mixing bowls | |
| Plastic spatula |
| Time on clock: | # of minutes: | Step #: | Directions: |
| 5 | 1 | Cell phones in holder Listen to class directionsTie up hair, check clothing Wash hands Grab apron, dish towels, and dish rag (backroom)Start dishwater | |
| 1 | 2 | Set out tray with lab plan & equipment on it | |
| 1 | 3 | Take tray to prep table to get ingredients/equipment in one trip | |
| 1 | 4 | Heat pan(s) over medium heat | |
| 5 | 5 | Place one tortilla at a time in pan and cook until you start to see some light browning | |
| 1 | 6 | Place warmed tortillas on plate | |
| 1 | 7 | Scramble two eggs using a whisk in bowl | |
| 1 | 8 | Heat second pan over medium heat and spray with cooking spray | |
| 5 | 9 | Pour eggs into hot pan and stir constantly scraping the cooked egg with each movement | |
| 5 | 10 | Cook until eggs are no longer runny | |
| 1 | 11 | Add salt and pepper | |
| 1 | 12 | Top warmed tortilla with cooked eggs | |
| 1 | 13 | Add cheese and toppings | |
| * | 14 | Each member repeats process | |
| 7 | 15 | Eat | |
| 5 | 16 | Wash and thoroughly dry dishes. Return dishes to their correct spot. | |
| 1 | 17 | Complete rubric and turn in | |
| 1 | 18 | Take aprons back to rack and put dirty dish towels in washing machine | |
| 1 | 19 | Call Miss Fenn over for checkout (you may have some additional tasks) | |
| 1 | 20 | Take lab plans back to binder, have a seat. |
My name is Ashley Horne and im in 11th grade. I enjoy playing softball and being with my family. I wanted to learn how to make new foods so I took this class. I’m excited to learn how to make homemade bread and cinnamon rolls